Back to: Computer Science Primary 1
Welcome to class!
In today’s class, we’re going to explore the creative process of drawing a simplified representation of a calculator, one of the essential ICT devices we encounter in our daily lives.
Common ICT Devices – drawing a calculator
Steps to Draw a Calculator:
Step 1: Basic Shape

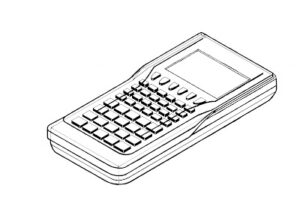
Begin by drawing a rectangle in the center of your paper or canvas. This rectangle will serve as the main body of the calculator. Ensure it has straight, even lines.
Step 2: Display
Inside the rectangle, draw another smaller rectangle near the top. This represents the calculator’s display screen. Make sure it fits neatly within the main body.
Step 3: Buttons
Below the display, draw rows of small square or rectangular buttons. These buttons are the keys of the calculator. Arrange them neatly in a grid pattern. You can vary the number of buttons depending on your design.
Step 4: Function Buttons
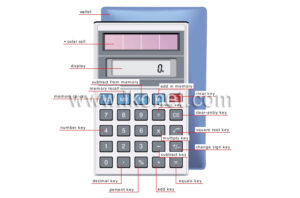
Above the display, add a row of smaller rectangular buttons. These are the function buttons often found on calculators. Include labels like “+,” “-“, “x,” and “÷” to represent basic arithmetic operations.
Step 5: Numerical Buttons
Fill in the rest of the button grid with numerical buttons from 0 to 9. Label them accordingly. Don’t forget the decimal point (.) and equal (=) button.
Step 6: Clear and Other Buttons
On the bottom of the calculator, draw additional buttons for functions like clear (C), delete (DEL), and perhaps memory (M) functions.
Step 7: Details
Add small details like a solar panel at the top (if your calculator has one), shading around the buttons to create depth, and small lines to represent the screen’s pixels.
Step 8: Shadows and Highlights (Optional)
To give your drawing a three-dimensional look, add some shading by lightly coloring the sides of the calculator and buttons.
Step 9: Final Touches
Go over your drawing with a fine-tipped pen or marker to outline and emphasize the shapes and details. Erase any unnecessary lines or smudges.
Drawing a calculator allows you to appreciate its functionality while expressing your creativity on paper or canvas. Enjoy your artistic journey!
Evaluation
Share your calculator drawings with friends or classmates. What features did you include? Did you choose a specific color scheme for your calculator?
We have come to the end of today’s class. I hope you enjoyed the class!
In the next class, we shall be discussing how to draw a digital wristwatch.
In case you require further assistance or have any questions, feel free to ask in the comment section below, and trust us to respond as soon as possible. Cheers!