Back to: Basic Science Primary 2
Hello children, welcome back to class
At the end of the lesson, pupils should be able to know, Pupils should be able to:
- prepare clay for moulding
- use clay for moulding.
- Mention some other materials used for moulding
- Make models of simple objects
Clay is one of the three types of soil (clay, sandy, loamy). is used for moulding and making bricks.
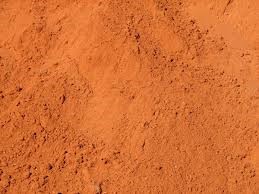 Clay Soil
Clay bricks have been used for building houses for hundreds of years. This soil is found near water and rivers. It is smooth when dry and sticky when wet.
If you take clay from a river bed, it normally has things in it. These extra items need to be taken out if you want to use the clay for modelling things.
There are two ways of cleaning clay. The first way to clean the clay is by drying it out so it becomes sandy. Once it is dry, you can sieve it to take out all the big pieces of stones or twigs. When it is clean and smooth, you can add water again until it is like dough and ready to use.
The other way of cleaning the clay is to first wedge the clay. You wedge clay by rolling it into a ball and then pushing down on it with the palms of your hands to flatten it.
To clean the clay, you wedge it, then cut it in half. Take out stones or twigs that you can see. Keep wedging and cutting the clay with the wire to take out the unwanted stuff.
Wedging is used to get all the air bubbles out of the clay.
Some other materials used for moulding are: wax, papier-mâché, broomsticks, plasticine, paper etc.
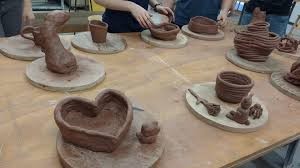
Making a model
It is important that the pupils get used to designing before making something. Once they have drawn their design, then they can start making their objects. Your mould must look exactly like your design.
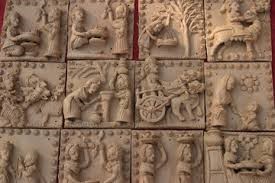
Objects moulded with clay:
We can make objects with clay or special type of clay called kaolin.

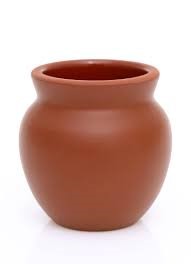
ACTIVITY
Mould a bowl with clay
Materials: Clay soil, little water, mould
Step 1: Roll the clay between your hands to make it smooth.
Step 2: Press your thumb into the clay to start making the bowl.
Step 3: Pinch the clay between your fingers and thumb to make the shape of the bowl.
Step 4: When you have made your bowl, you can use it to put sweets in.