Back to: MATHEMATICS JSS3
Welcome to JSS3 Third Term!
We are eager to have you join us in class!!
In today’s class, We will be discussing Geometric Construction. We hope you enjoy the class!

Geometric Construction
Using ruler and compasses
Remember the following when making geometrical constructions.
- Use a hard pencil with a sharp point. This gives thin lines which are more accurate.
- Check that your ruler has a good straight edge. A damaged ruler is useless for construction work.
- Check that your compasses are not too loose. Tighten loose compasses with a small screwdriver.
- All construction lines must be seen. Do not rub out anything which leads to the final result.
- Always take great care, especially when drawing a line through a point.
- Where possible, arrange that the angles of intersection between lines and arcs are about 900.
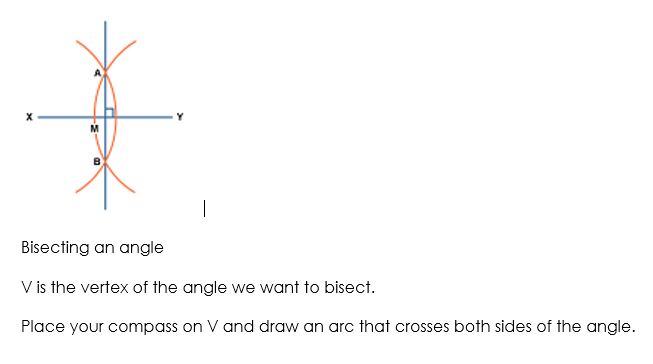
The perpendicular bisector of a line segment
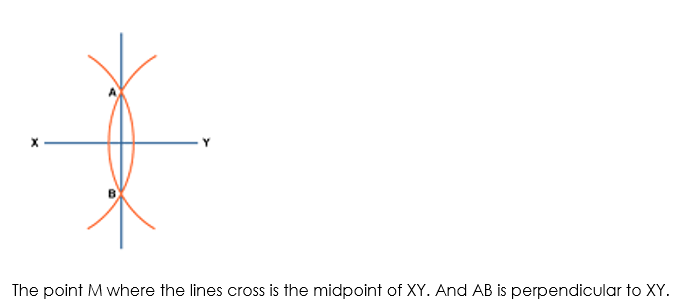
The locus of a point which moves so that it is an equal distance from two points, A and B, is the perpendicular bisector of the line joining A and B.
Perpendicular means at right angles to.
Bisector means cuts in half.
To construct this locus, you do the following (try this yourself on a piece of paper):
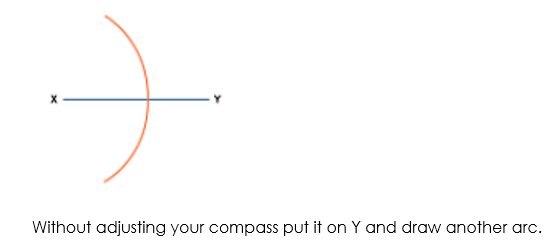
Draw the line segment XY.
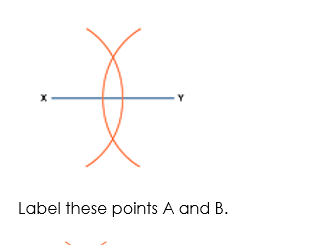
Put your compass on X and set it to be over halfway along the line. Draw an arc.
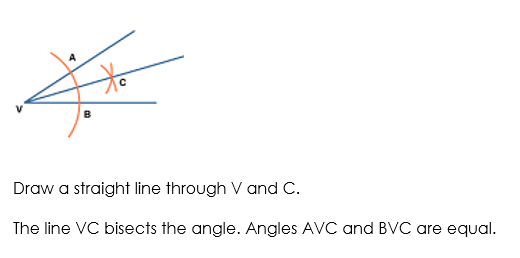
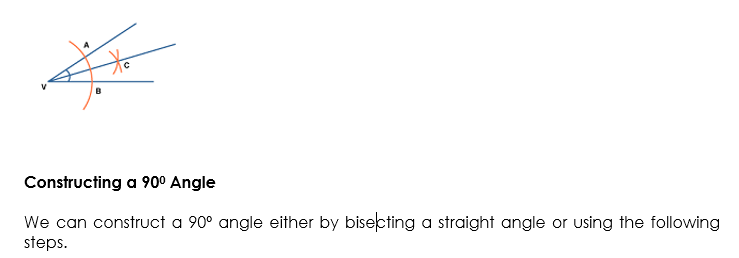
Constructing a 900 Angle
We can construct a 90º angle either by bisecting a straight angle or using the following steps.
Step 1: Draw the arm PA.
Step 2: Place the point of the compass at P and draw an arc that cuts the arm at Q.
Step 3: Place the point of the compass at Q and draw an arc of radius PQ that cuts the arc drawn in Step 2 at R.
Step 4: With the point of the compass at R, draw an arc of radius PQ to cut the arc drawn in Step 2 at S.
Step 5: With the point of the compass still at R, draw another arc of radius PQ near T as shown.
Step 6: With the point of the compass at S, draw an arc of radius PQ to cut the arc drawn in step 5 at T.
Step 7: Join T to P. The angle APT is 90º.

Constructing a 300 Angle
We know that: ½ of 600 = 300
So, to construct an angle of 30º, first, construct a 60º angle and then bisect it. Often, we apply the following steps.
Step 1: Draw the arm PQ.
Step 2: Place the point of the compass at P and draw an arc that passes through Q.
Step 3: Place the point of the compass at Q and draw an arc that cuts the arc drawn in Step 2 at R.
Step 4: With the point of the compass still at Q, draw an arc near T as shown.
Step 5: With the point of the compass at R, draw an arc to cut the arc drawn in Step 4 at T.
Step 6: Join T to P. The angle QPT is 30º.
Constructing a 600 Angle
We know that the angles in an equilateral triangle are all 60º in size. This suggests that to construct a 60º angle we need to construct an equilateral triangle as described below.
Step 1: Draw the arm PQ.
Step 2: Place the point of the compass at P and draw an arc that passes through Q.
Step 3: Place the point of the compass at Q and draw an arc that passes through P. Let this arc cut the arc drawn in Step 2 at R.
Step 4: Join P to R. The angle QPR is 600, as the ∆PQR is an equilateral triangle

We have come to the end of this class. We do hope you enjoyed the class?
Should you have any further question, feel free to ask in the comment section below and trust us to respond as soon as possible.
In our next class, we will be talking about Tangent of an Angle. We are eager to meet you there.